Solar Cable Roof Entry That Does Not Leak
By Frank Zale · September 3, 2026 · 5 min read
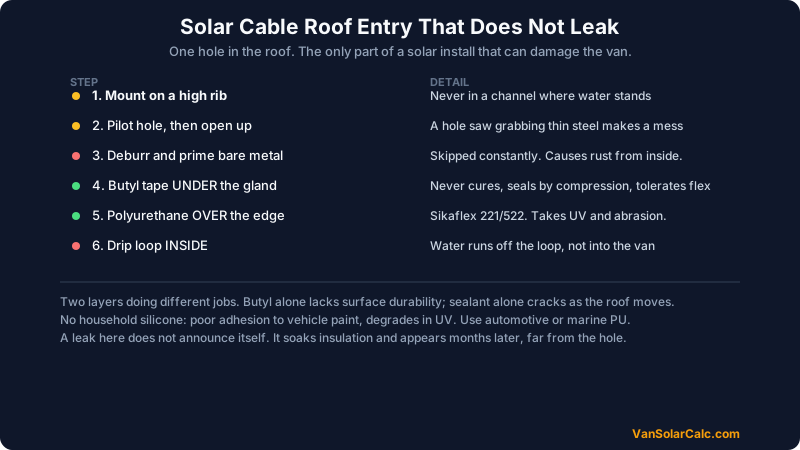
Every solar install needs one hole in the roof. It is the part of the build people rush, and it is the only part that can quietly destroy the van rather than the electrical system.
A leak here does not announce itself. It runs down the inside of the roof skin, soaks the insulation, and appears months later as a damp patch nowhere near the hole.
The cable entry gland
The standard solution is an ABS cable entry gland: a low-profile housing bonded to the roof, with sealed ports for the solar cables to pass through. Most take cable from 2 mm² to 6 mm², which covers typical van solar runs.
Two things make it work: a compression seal around each cable, and a bonded base that keeps water out of the hole itself. Both have to be right. A perfect base seal with cable grommets left loose still lets water track down the cable into the van.
The sealing method that actually holds
The approach used by builders who do not get leaks is two layers doing different jobs.
Layer one: butyl tape, under the gland. Butyl never fully cures. It stays permanently flexible and seals by compression, which means it tolerates the roof flexing and the temperature swings a vehicle sees. Cut a piece to the footprint of the gland base, press it down around the hole, then bed the gland onto it.
Layer two: a polyurethane sealant, over the edge. Sikaflex 221, 252 or 522 and similar products form a tough skin over the perimeter and any fastener heads. This is the layer that takes UV, wind and pressure washing.
Butyl alone lacks the surface durability. Sealant alone cracks over time as the roof moves. Together they cover both failure modes.
Doing it properly
- Pick the location first. Under the panel where possible, so the gland is shaded and shielded from direct weather and UV. Keep it out of standing water: on a ribbed roof, mount on a high rib rather than a channel where water sits.
- Drill smaller, then open up. Start with a pilot hole and work up. A hole saw grabbing on thin steel makes a mess you cannot unmake.
- Deburr and prime the bare metal. A drilled hole leaves raw steel that will rust from the inside out. File the edge smooth, then treat it with primer or paint. This step is skipped constantly and is the reason old installs weep rust.
- Clean and degrease the whole area. Sealant does not bond to road film or wax.
- Butyl down, gland on, compress firmly. You want butyl squeezing out slightly at the edges.
- Seal the perimeter and any screws. If you use screws, seal the heads too. Many glands need no fasteners at all when bedded on adequate sealant.
- Tighten the cable seals onto the cable, not onto the insulation jacket edge.
- Add a drip loop inside. Leave slack so the cable dips below the entry point before rising to the controller. Any water that does track along the cable drips off at the bottom of the loop instead of running inside.
Alternatives to drilling
Gutter or door-seal entry. Running cable through an existing rubber seal avoids a hole entirely. It works, but the cable is pinched every time the door closes and it eventually chafes. Acceptable for a portable panel, poor for a permanent install.
Existing vent or fan penetration. Sometimes cable can share an existing sealed opening. Tempting, but you are disturbing a seal that currently works, and fan housings are not designed for it.
Through a rear light or existing grommet. Practical on some vans and worth checking before you drill anything new. The best hole is the one already there.
What goes wrong
- No drip loop. Water runs along the cable and into the van, past a perfectly good gland.
- Sealant on a dirty roof. It looks sealed and lets go in a season.
- Mounted in a water channel. Standing water finds every weakness eventually.
- Bare drilled steel. Rust starts inside the panel where you cannot see it.
- Silicone bathroom sealant. Poor adhesion to automotive paint and it degrades in UV. Use an automotive or marine polyurethane.
After the hole
Once cable is inside, the run to the controller needs protecting from chafe and correctly sized for the current. See wire gauge for solar panels on a van and the connector detail in MC4 connectors explained.
The gland is also on the twice-yearly inspection list, since sealant is the one part of a solar install with a limited life. See cleaning and maintaining van solar panels and, for panel fixings, how to mount solar panels on a van.
FAQ
How do you run solar cables into a van without leaks?
Use a cable entry gland bedded on butyl tape with a polyurethane sealant such as Sikaflex over the perimeter, and add a drip loop on the inside so water cannot track along the cable. Mount it on a high point rather than a water channel, and prime the bare metal around the drilled hole.
What sealant should I use for a solar cable gland?
Butyl tape under the gland for a permanently flexible compression seal, and an automotive or marine polyurethane sealant such as Sikaflex 221 or 522 over the edges for UV and abrasion resistance. Avoid household silicone, which adheres poorly to vehicle paint and degrades in sunlight.
Can I run solar cables through a door seal instead of drilling?
You can, and it avoids a hole, but the cable is compressed every time the door closes and will eventually chafe through. It is reasonable for a portable panel you set up occasionally, and a poor choice for a permanently mounted array.
Where should I put the cable entry on a van roof?
Under a solar panel if possible, so it is shaded from UV and shielded from direct weather, and on a raised rib rather than a channel where water collects. Also check for an existing grommet or unused penetration, since the safest hole is one that already exists.